File Management
Working with Files and Folders
The folder structure on a drive is similar to that of a tree. A folder can contain files, but also other folders (“subfolders”).
The top level of the folder structure is the root folder (e.g. “C:\”).
You can use file extensions to identify the type of file. The file extension is part of the file name and forms its end. Most files contain an extension.
Examples:
| Filename.txt | A text file |
| Filename.docx | A Word document |
| Filename.exe | An executable Program file |
| Filename.html | An HTML document (web page) |
Files and folders are collectively referred to as “objects”.
Operation Center shows the contents of a folder in the form of a tabular list:
Name Size Type Last modified Description
| Name | This is the name of the object. |
| Size | For files, the size in bytes is displayed here. |
| Type | Here you can see whether the object is a folder or a file.
For For files, you can see the file type and extension here. |
| Last Modified | Here you can see when the object was last modified. |
| Description | If you have assigned a description to the object, it will be displayed here. |
In the “Operation Center Quick Access” you'll find an overview of often used file extensions and what they mean in each case.
Above the list with the folder contents you will find the item “More”. Hover your mouse over it when you want to go to a folder such as “Documents” or the desktop. Here you can also change to another drive (e.g. “D:”).
A PC contains at least one drive. A drive can be, for example, a hard drive, a DVD drive or a USB stick.
The boot drive almost always has the drive letter C :. This is a holdover from the time when PCs didn't have a hard disk. Most of them contained two floppy disk drives with the letters A: and B :. When both drives were later supplemented by a hard disk, it was often assigned the drive letter C: by default. This is still the case today.
Working with Tabs
In both file windows you have the option to open two folders in parallel using tabs:
Click on “Tab +” to open another tab. Click on the tab using the right mouse button to close it.
Access to Network Folders
▶ Drive – Map Network Drive
You have the option of accessing network folders with Operation Center. This requires assigning a drive letter to the network.
To do this, use the function “Drive – Map Network Drive” and assign a drive letter to the network so that it is treated like a normal drive.
NOTE:
Make sure that all network drives are accessible and responsive. Otherwise, Operation Center may occasionally not respond for a few seconds.
Select/ Unselect Group
▶ Organise – Select Group
▶ Organise – Unselect Group
You can select and unselect a specific group of files using this function. Enter the desired mask to accomplish this (e. g. „*.bmp”).
Copy and move Objects
▶ Organise – Copy
▶ Organise – Move
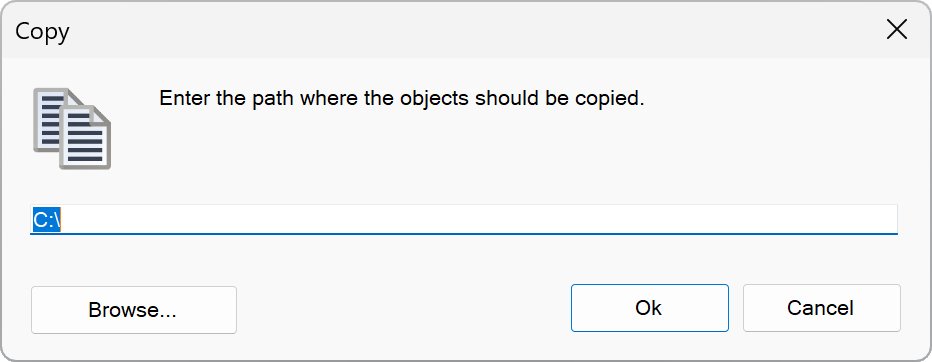
Files and folders collectively are called as objects. Select the objects that you want to copy or move to another location. Then select the “Copy” or “Move” function. A window opens, here you must select the destination path in which the objects should be copied or moved. Select “Ok” to start the process:
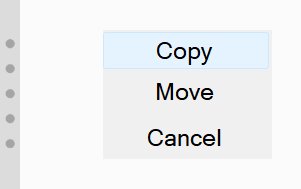
If you work with two file windows you can copy and move objects easily using drag & drop. Select the respective objects and point the mouse over them. Now hold down the left mouse button and pull the mouse pointer to the other file window. Release the left mouse button when the mouse pointer arrived there. A small menu appears, you need to select if you want to copy or move the objects here. Select the desired option to start the process:
If your PC has a touch screen you can copy and move objects by pulling using your pen.
After copying you can also verify the files with SHA256. This provides further protection, in addition to the standard test, in order to detect possible errors during copying.
Duplicate Objects
▶ File – Duplicate
This function creates a copy of a file or folder in the same folder.
This can be useful when you want to edit a file but still want to keep a copy of the original one to be able to undo changes.
Delete Objects
▶ Organise – Delete
Files and folders collectively are called as objects. Select the objects that you want to delete. Then select the “Delete” function. A window to confirm the deletion is opened. Here you can also check your selection again. Select “Ok” to start the process.
Information regarding the secure deletion of files can be found unter “Secure Delete Files”.
Secure Delete Files
▶ File – Secure Delete
If files are deleted normally you may be able to recover them using special recovery tools. In the case of secure deletion, this is made difficult, if not almost impossible, depending on the safety level.
Select the files that you want to delete. Then open the “File” menu and select the “Secure Delete” function. A window to confirm the deletion is opened. Here you can also check your selection again. Select “Ok” to start the process.
Only files can be safely deleted, but not a whole folder.
ATTENTION! Please take special care when using this function!
NOTES:
1) For technical reasons, when using SSD and Flash-based drives it cannot be ensured that the file data is actually overwritten. Restore with recovery tools is usually not possible, because the assignment of the file name to the data is canceled. However, under laboratory conditions the data may be recoverable, but with some effort.
2) If there are shadow copies of files, these are not automatically deleted.
Rename
▶ Organise – Rename
This function allows you to rename an object.
If several objects are marked, they can be uniformly named and numbered automatically. Choose the option “Uniform name and numbering” therefor:
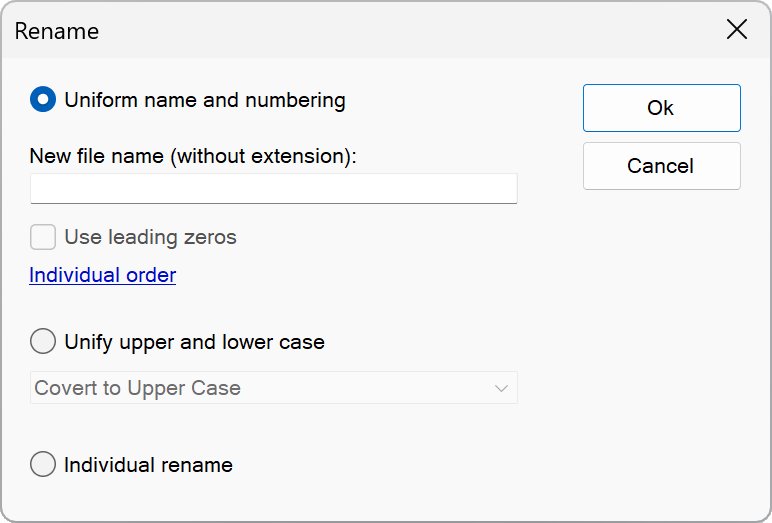
You can also unify the case of the names of the selected objects. Choose the option “Unify upper and lower case” therefor.
You can also rename the selected objects individually.
New Folder
▶ File – New – Folder
You can create a new folder here.
You can create a single folder or a folder with additional subfolders.
The following example creates a single folder:
“Vacation_2024”
The following example creates a folder with additional subfolders:
“Vacation_2024\Week_1\Day_1”
Selecting the option “Change to new folder after creation” causes that the folder will be opened after its creation.
Change Attributes
▶ File – Change Attributes
With this function you can display or set the attributes of an object or multiple objects, as well as change their date and time:
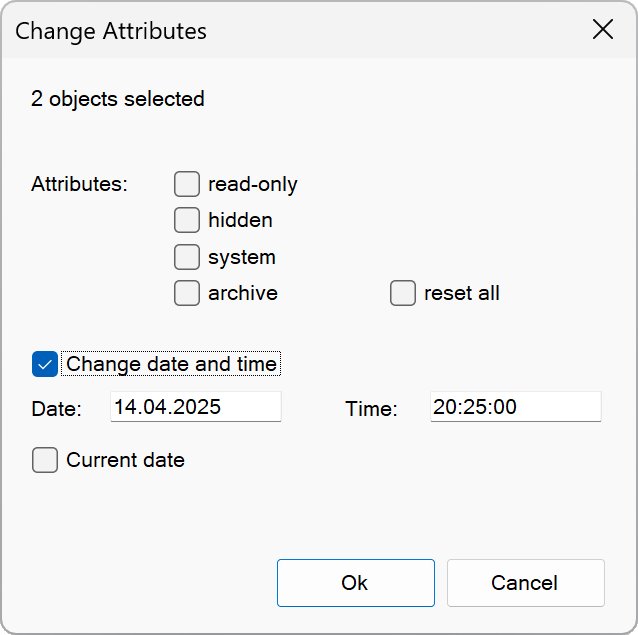
NOTE: Daylight saving time is taken into account when changing the date. For this reason, the specified time on other PCs may differ by one hour.
Edit Description
▶ Extras – Edit Description
You can use this function to assign a description to an object. It is shown in the file window when objects are displayed as a detailed list (“More – Detailed list”) and in the “Tasks & Preview” bar once the object is selected.
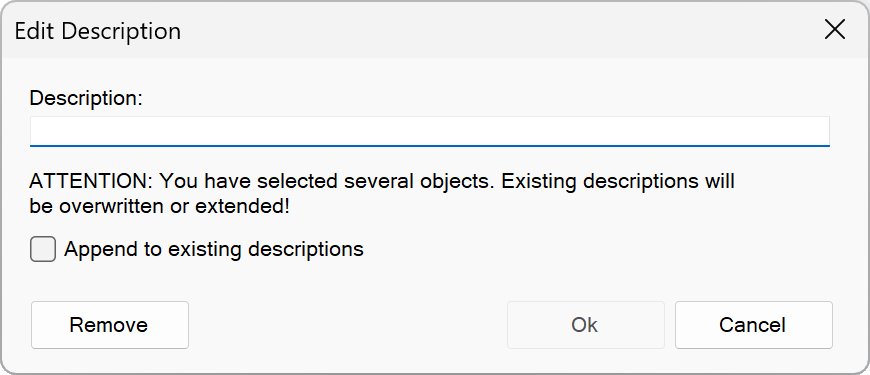
Descriptions for objects are stored in the same folder in the hidden file “Descriptions.oc”.
Compare Files
▶ File – Compare Files
With this function you can compare two files with each other.
You will be informed if any differences were found. The differences found are also displayed for some file formats.
Show MD5
▶ File – Show MD5
Displays the MD5 checksum of one or more selected files.
Show SHA256
▶ File – Show SHA256
Displays the SHA256 checksum of one or more selected files.
Print File Content
▶ File – Print – File Content
This function prints the content of the selected file.
Use “Show Photos” if you want to print several photos. You can also use it to print photos as a draft.
Print File List
▶ File – Print – File List
This function prints a list of the folder contents.
If you have selected several objects, only these entries will be printed and not the whole list.
If you have assigned descriptions to objects, you should print file lists in landscape format for better readability.
Creating a ZIP Archive
▶ File – Print – New – ZIP Archive
This function creates an empty ZIP archive in the current folder. Double-click its filename to open it.
Pack in ZIP Archive
▶ File – Pack in ZIP Archive
This function packs the selected files and folders into a ZIP archive.
Enter the name of the ZIP archive in the “Archive name” text field.
On “Compression” you can select the compression level. If no compression is used, the process is quick.
If you choose the best compression level, the process may take a little longer, but the file size of the ZIP archive will be smaller.
Extract a ZIP Archive
Right-click on a ZIP archive and choose “Extract...” from the menu to extract the contents of the ZIP archive.
Testing a ZIP archive
This function tests a ZIP archive for possible errors. Click on the right button in the ZIP archive and view the menu with the “Test” option.
Tree View
▶ Extras – Tree View
In the tree view, the entire folder structure of the current drive is displayed as a tree structure.
Click + or – to expand or collapse a branch. Double-click a folder to visit it.
Search
▶ Search – Normal Search
This function allows you to search for files on a drive.
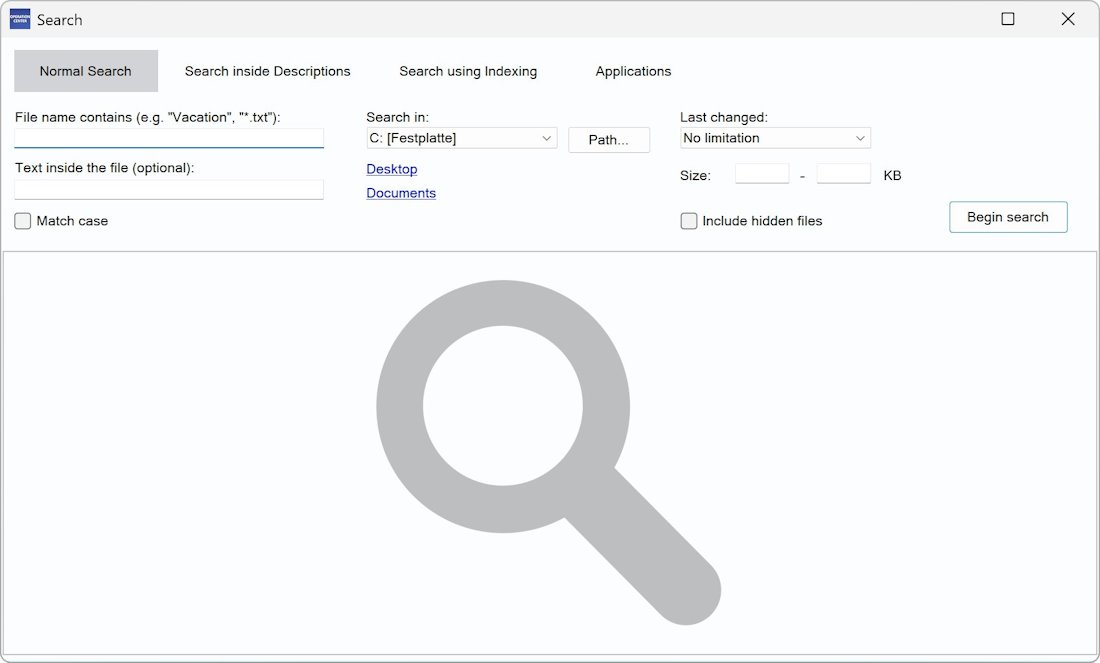
Enter the corresponding file name, a part of it or a file mask (e. g. “Holiday” or “*.txt”) and choose “Begin search”.
On “Text inside the file” you can specify whether the file content should contain a specific string. This works well for text-based file formats. In addition, rich text, Word and ODT documents are supported. For binary formats (e.g. PDF), using this field is less useful.
On “Search in” you determine in which drive should be searched. Under “Path” you can limit the search to a specific path and its subfolders.
You can also limit your search to a specific time period and file size.
Use the “Search inside Descriptions” tab to find files by descriptions assigned in Operation Center.
Use the “Search using Indexing” tab to find your own documents, pictures and music as well as files on your desktop quickly. For this purpose, the corresponding folders will be indexed at the beginning. The names of all files contained therein will be stored in a local database that increases the speed of the search significantly.
Use the “Applications” tab to list all installed applications found on the system. Double-click an entry to open an application. Right-click an entry allows you to create a shortcut on the desktop.
FTP
▶ Online – FTP
This utility allows you to access a FTP server and provide files there or download them to your PC.
You must first log on to the server. Enter the required data (server name, user name and password) and then choose “Ok” to connect to the FTP server.
After the connection is established, you will see two file windows. The left window shows local files. The right window shows files that are located on the FTP server.
You can upload and download files by selecting them and then clicking the button with the respective arrow.
HINTS:
1) Saving the password is a security risk!
2) A FTP server is a computer that is often far away from your location. To prevent unnoticed transmission errors, you should always check whether the file is working properly after each upload or download.
🠈


